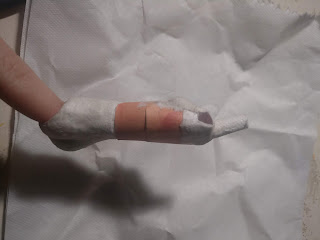
And so it begins.
It took a little longer to post than I expected, but here it is the promised part 2.
What does it cover? The torso.
Let us begin
Also, you can see the head from the previous post. I did both of them at about the same time, it just took a lot of extra layers to fill her out.
I like to begin this part, by putting down one long piece, like you see in the above pictures. This acts as a placement for her breasts, and also let me know in this case that they were saggy because I didn't account for the added height. Oops.
Also at this point, glue a thin base layer around the waist cone. It helps secure it, and blend it.
Please enjoy a step by step on how I build paper breasts.
Glue, glue is very good. Use it at your discretion. I like a little bit more for this part of the process. It bleeds out the sides of the napkin and blends the edges to the surrounding material.... Probably because it's pulp at that point. But it works.
Simply repeat the process. Over and over and over........
Now, about this point I'm pretty happy with the basic profile for the chest. It's small and can be built on, if I so choose.
Now, if the chest is good enough for now, it's time to move on down. Personally, I like to balance the hips against the chest, so I do the hips.... And the butt, after the chest.
As I hope you can see, there's a slight division, I try to make sure that it's always there. Every so often I add a piece of paper in between.
As you can see below, I've added more on the lower portion of the butt, I'll blend it into the back in a bit. This is usually how it goes.
I'd also like to point out that the hips have now been blended to the tube.
I like to turn the figure as I go so I can decide if the silhouette looks good.
Now, same thing with the head and the chest, you repeat the process until you're happy.
This is about where I was happy.
So that's "sculpting" the head and torso. I hope you enjoyed it, sorry it took so long to post them.
If anyone has any QUESTIONS as to how I do things, I'd be happy to answer them as best as I can.
I would also like to take a moment to appreciate the versatility of paper. Below is an image of all the different characters I started working on using the same base model. I love paper.
Until next post, Fare well.


Pretty awesome results from such a simple material! Thanks for sharing, and blowing away my expectations for what can be done with paper!
ReplyDeleteThank you very much!
Delete